Many Airtime users like to record their radio streams to publish them as a podcasts, or to replay their live shows at a later time. You can’t record radio streams from within the Airtime Pro interface, but it’s possible to use 3rd party software to record your streams for later use. Please be wary of recording streams containing copyrighted content. Airtime is not responsible for any royalties or reporting required for Podcasts or online radio streaming. We recommend that you research music licensing for your region.
How to use VLC to record your Stream
One of the easiest free tools for stream recording is VLC media player. VLC media player is available for Windows, Mac, Linux, and Android platforms. To get started recording your streams, download a copy of VLC media player here: http://www.videolan.org/vlc/
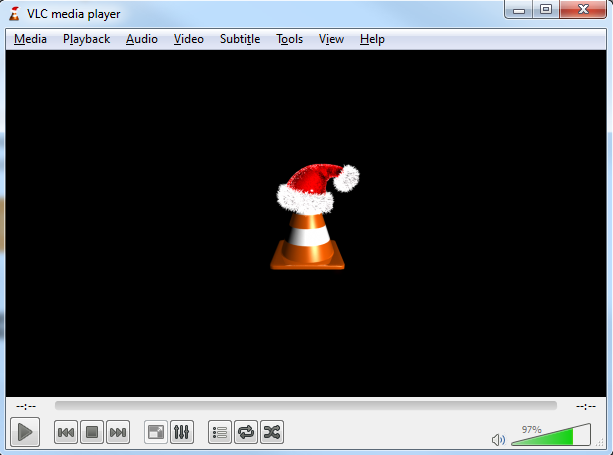
Once you’ve downloaded and installed VLC media player on your device, open VLC. You will need to input your stream details so that VLC knows where to record from.
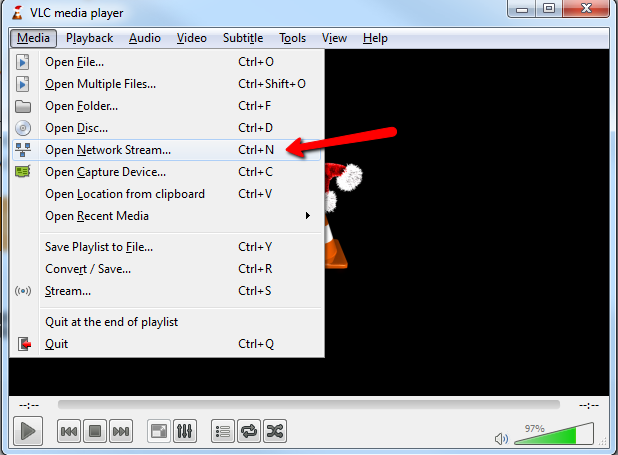
To connect VLC to your Airtime stream, select the Media menu, then choose Open Network Steam (Crtl +N).
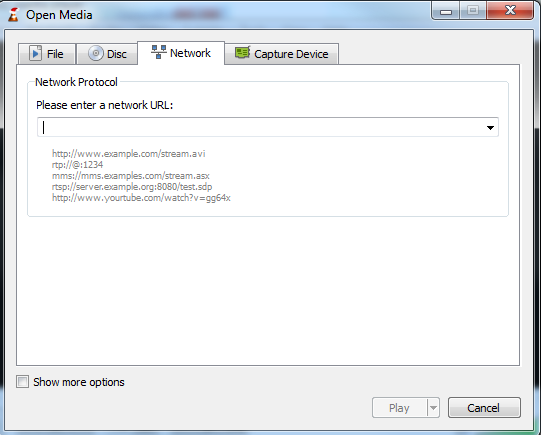
In the Open Media window, enter your stream address in the Network URL box provided. You can find your stream URL in the Airtime interface by selecting Settings > Streams. You will see your stream URL at the bottom of the Output Streams section in Airtime. Copy and paste either stream URL into the network URL textbox in VLC.
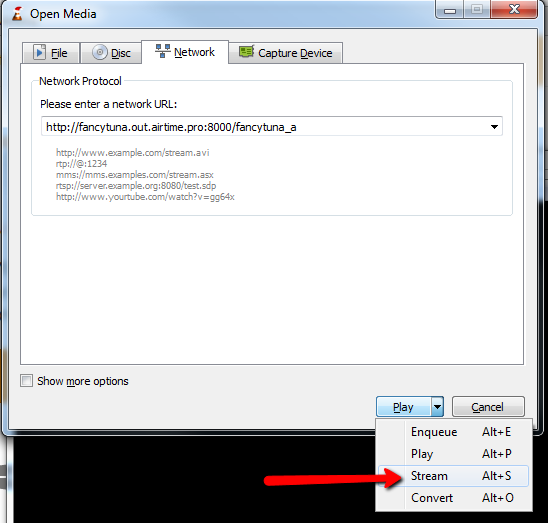
Click on the drop-down menu attached to the Play button, select the Stream (Alt +S) option.
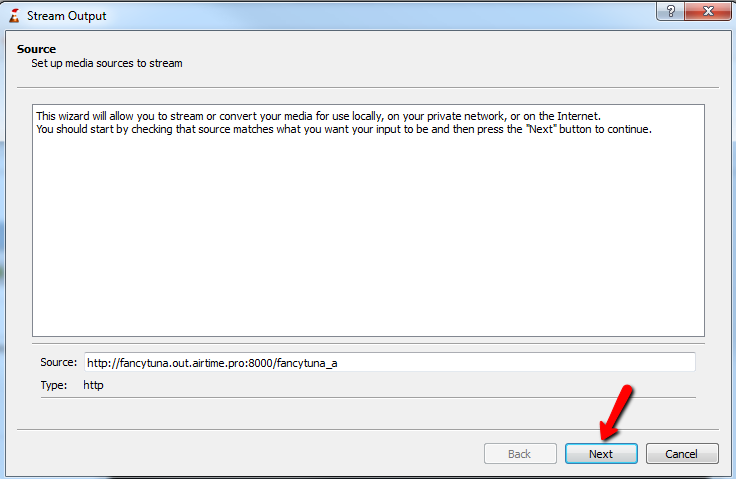
On the Stream Output window, confirm that your stream address is entered correctly in the Source textbox, then click the Next button on the Stream Output window.

The destination should be set to File in the drop-down menu, then click the Add button.

Enter a filename for your recording, then click on the Browse button to select a folder on your device to which you will save the stream recording file.
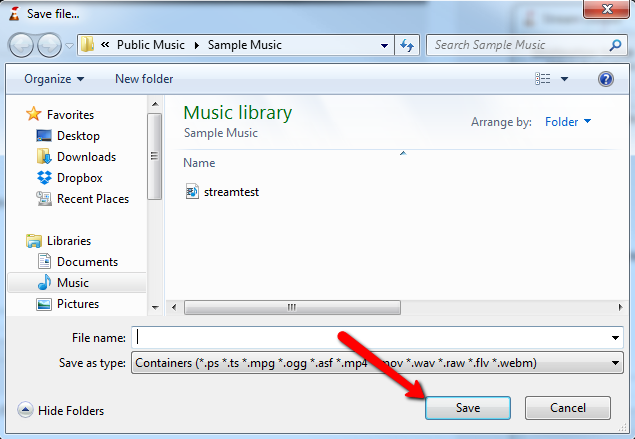
On the computer Save file window, enter the filename, then click the Save button. If you are using Windows, the Save file window will look like the one pictured above. Once you’ve clicked the Save button, the window will close.
Then in the VLC Stream Output window, click the Next button.
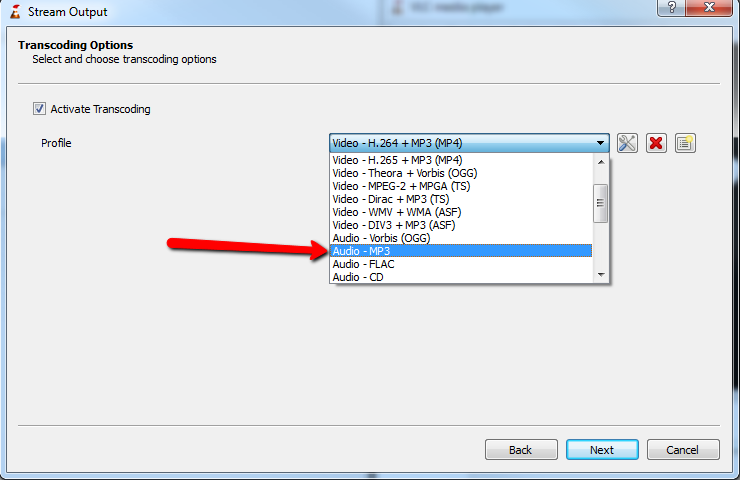
Make sure that the Activate Transcoding button is checked. Note that you can record the file in various formats using VLC including .mp3, mp4, and ogg. We recommend the .mp3 format for recording your streams because it is a format supported by Airtime should you want to upload it as a track or publish it as a podcast. Select the Audio-MP3 profile from the drop-down menu, then click the Next button.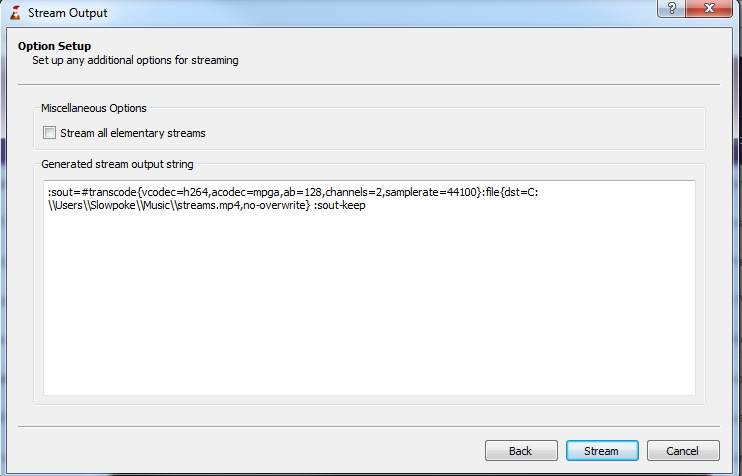
When you are ready to begin your recording, click the Stream button at the bottom of the Steam Output window.
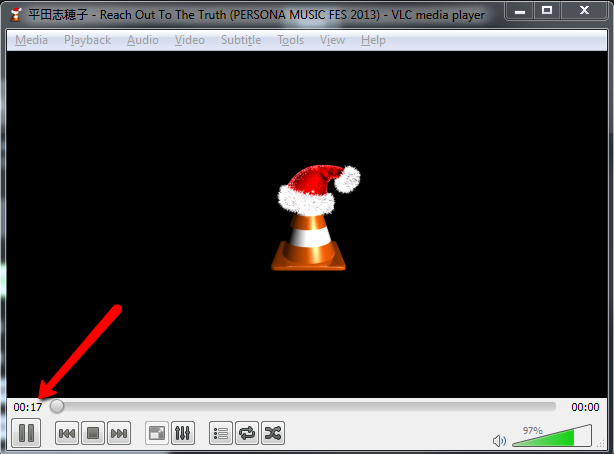
You will know that you are successfully recording when you see that the elapsed time is adding up.
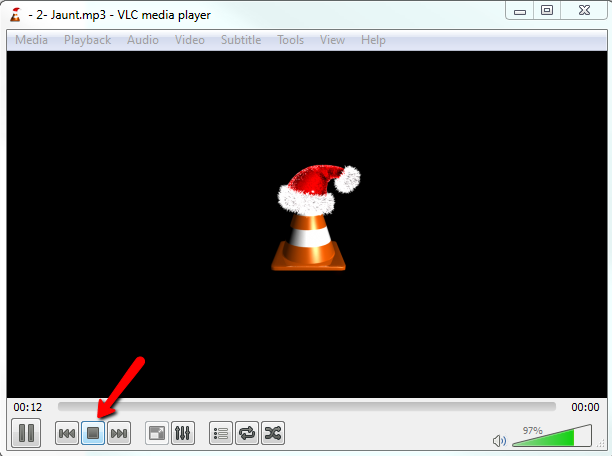
When you are done recording, click the stop button (indicated above).
You can listen to the file that you’ve saved by opening it on your computer or uploading it into Airtime and listening to it in the Tracks tab. Remember that you should not record copyrighted shows or shows that you do not have ownership of.
0 Comments