 You will find your Dashboard icon on your Workspace Panel.
The Dashboards for shared Desks are configured by administrators (or other users with the required privileges, such as bureau chiefs, desk heads, etc). The Dashboard is designed to give a quick overview of information that matters for the respective desk’s members. Users are able to configure the Dashboards in their Custom Workspaces. You can return to your Dashboard by clicking the home-shaped icon in the Workspace Panel, on the left.
You can only view the Dashboards for Desks to which you are assigned. Every user can also have a Custom Workspace which is only accessible to them, on which they can have customized widgets to suit their needs, for example monitoring several different Desks in one place. Standard Dashboard widgets are explained in detail in this section. Your Superdesk instance might also have custom widgets.
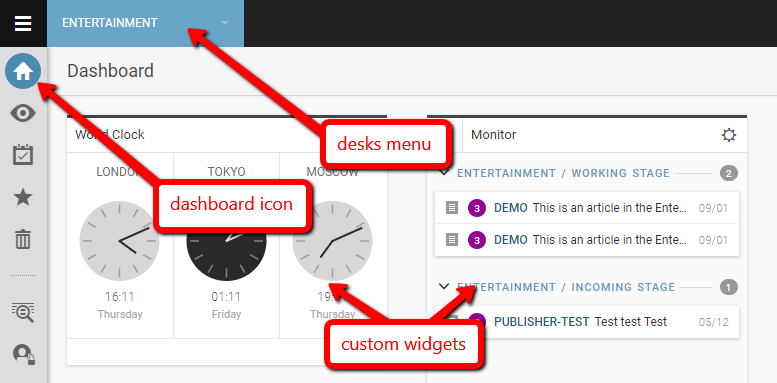
Beside the Hamburger Menu, you’ll see the blue drop-down Desks menu. It will display the name of the desk you’re currently working on. Click on the desk name and you’ll be able to view all desks you’re assigned to. Desks can be configured by editors/managers to have different Dashboard setups depending on the needs of your team.
Changes that are made to a Dashboard on a Desk will be visible to all users assigned to that Desk. Widgets on the Dashboard of your Custom Workspace are visible only to you.
 This is the Create icon.
When you are on a Dashboard, you will see the Create icon in the top right corner of the Dashboard pane, just below your user icon.
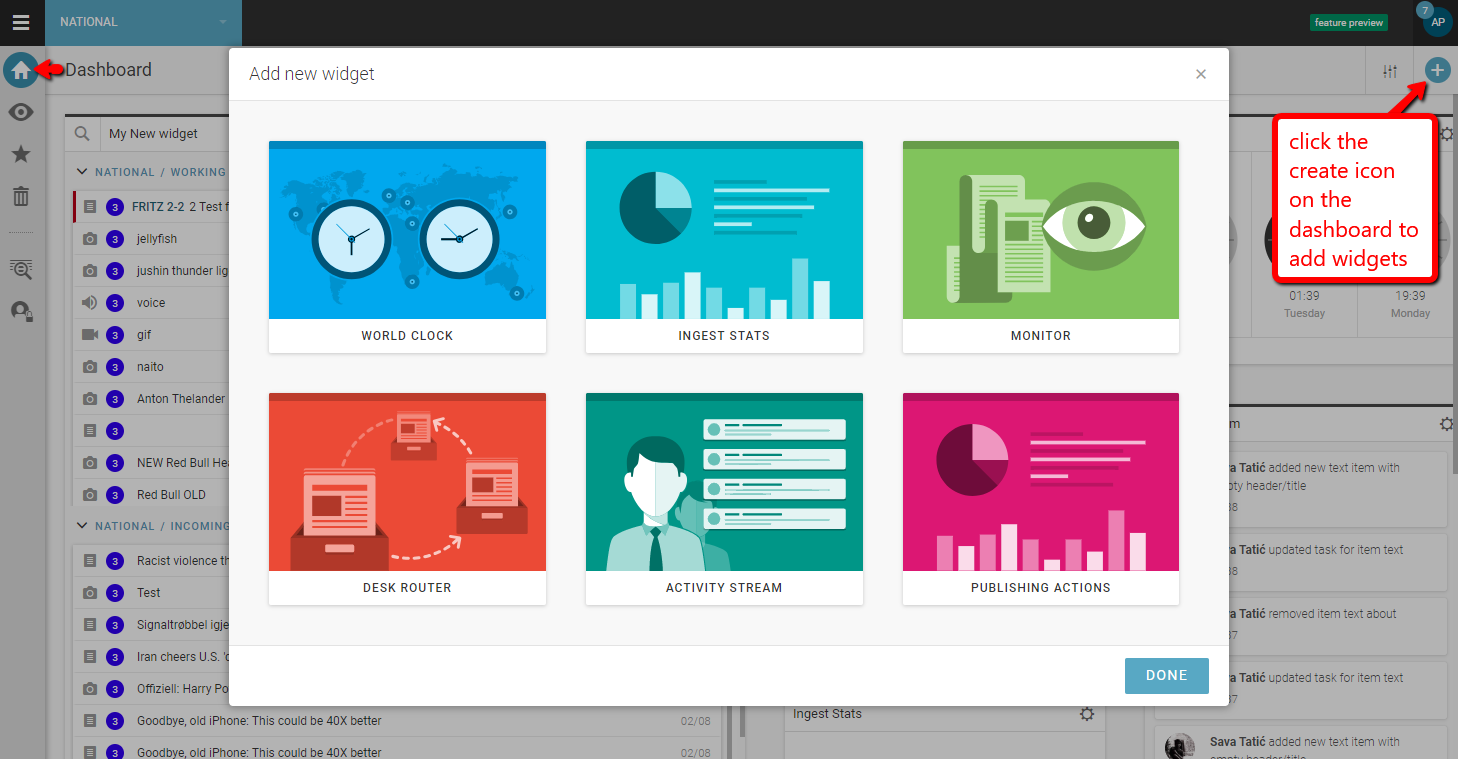
If you have the appropriate privileges, you can customise the widgets on your Desk Dashboard by clicking the Create icon at the top-right section of the pane. When you click the Create icon, a new window with widget options will open. Select the widget that you would like to add to your Dashboard, then click add this widget. Once you’ve selected the widget you would like to add, click the Insert this Widget button to place the widget on your Dashboard. You can add multiple displays of the same type of widget to any Dashboard.
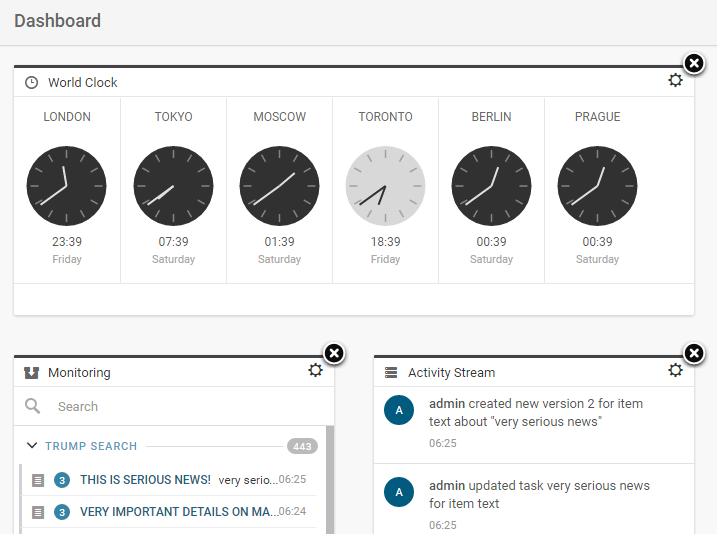
You can arrange the widgets on your Dashboard in any configuration you like.
 This is the Rearrange Widgets icon.
Click the Rearrange Widgets button at the top-right corner of the main interface, then select and drag a widget to the desired area of your Dashboard to place it.
The Rearrange Widgets button also allows you to delete widgets that you have inserted. To delete a widget, click Rearrange Widgets and you’ll see an x appear in the top-right corner of each widget. Click the 'x' for each widget you’d like to delete.
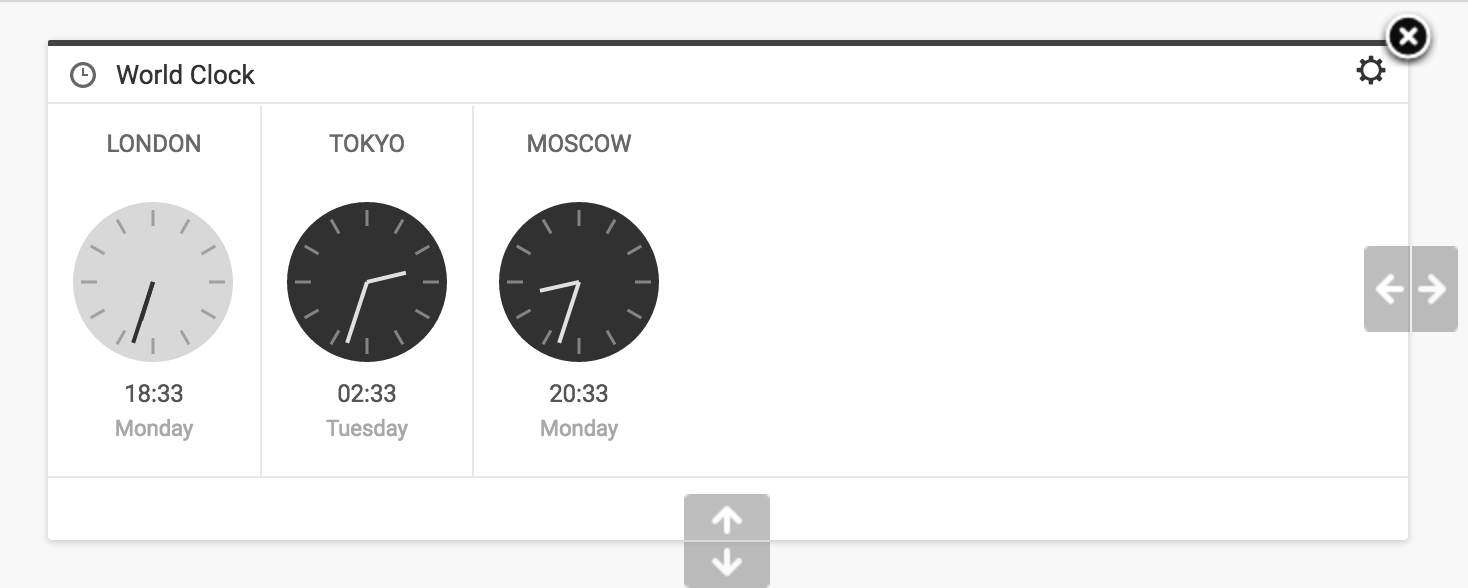
You can also resize widgets by clicking the grey arrows that appear at the edges of each widget when you hover over them.
Click and drag the body of the widget to move it to a different spot of the Dashboard. The widgets will fill the space as efficiently as possible. If there is a gap above one of the widgets, it will automatically move up to fill the space.
Each widget also has several settings associated with it. Click the gear icon in the top-right corner of a widget to adjust the individual settings for that widget. The individual widgets are explained in detail in the full version of the manual: https://sourcefabricberlin.zendesk.com/hc/en-us/articles/115001628863-Download-Superdesk-Manual
When you are satisfied with the size and layout of your widgets, click the blue checkmark in the top-right of the Superdesk interface to keep these changes.
0 Comments