Live broadcast with BUTT and Airtime Pro
BUTT (Broadcast Using This Tool) is a 3rd party application that you can use to broadcast live to your audience. Sourcefabric is not affiliated with BUTT, but we know some of our users are interested in learning how to broadcast live so we have some instructions here. Currently, broadcasting live requires the integration of a 3rd part software, such as BUTT. BUTT is free to download and is compatible with several different operating systems.
Step 1: Download BUTT version 0.1.13
First, you must download a copy of BUTT (Broadcast Using This Tool) onto your computer. Please download BUTT version 0.1.13, newer versions will not work with Airtime Pro. You can download it by visiting: https://sourceforge.net/projects/butt/files/butt/butt-0.1.13/. BUTT works with Mac, Linux, Ubuntu and Windows. Note that you must download an older copy of BUTT than the current version.
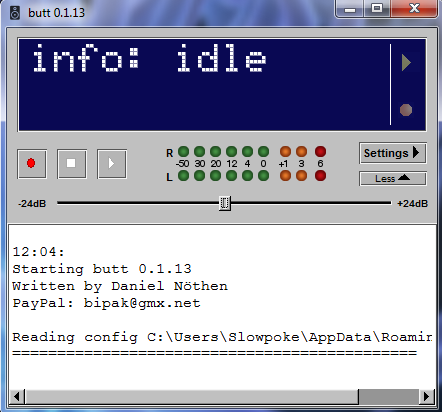
BUTT version 0.1.15 will not work with Airtime PRO. To find out what version of BUTT you are using, check the application title bar.
Step 2: Open BUTT on your computer.
Once you’ve downloaded BUTT, install it on your computer and open the software. When you have successfully installed and opened BUTT, you will notice that the main display says info: idle.

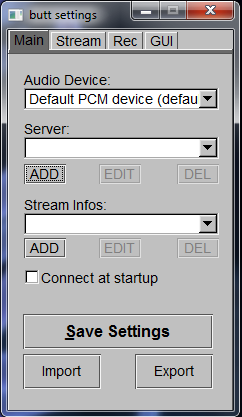
Click the Settings button on the right side of the BUTT interface.
Step 3: Locate your Live Broadcasting connection details in Airtime Pro.
You can find you connection details within Airtime Pro by selecting Settings > Steams > Live Broadcasting.
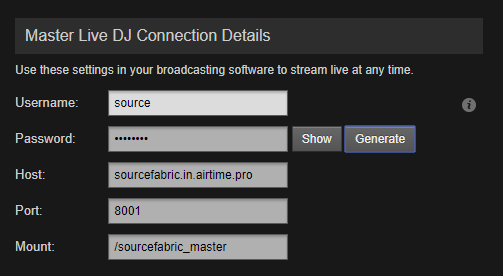
Step 4: Add your Airtime Pro connection details in the BUTT interface.
In the main tab of the BUTT settings, click the ADD button below the Server drop-down menu.
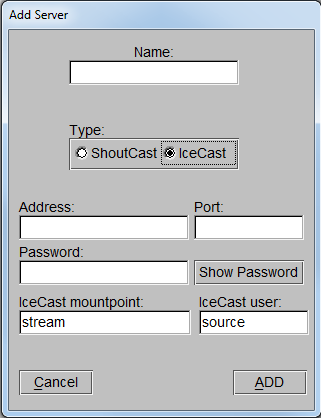
In the Add Server dialog, enter your stream connection details as they appear in your instance of Airtime Pro.
Unless you are using custom Airtime hosting, you will choose the IceCast server type. You will need to fill in all the other text boxes with information to match your stream. You can find these details in your Airtime interface under Help > Broadcasting Live > I have broadcasting software > BUTT > Connection Details.
Enter the information in the Connection Details exactly as they appear in Airtime into the BUTT interface. Using the Connection Details from Airtime, you will need to fill in the following fields in the BUTT interface: Address, Port, IceCast mountpoint, Password and IceCast user. At the top of the Add Server window, you must enter a name for your server connection in BUTT. You can name the server connection whatever you want.
Step 5: Choose your Audio Device.

In the Main settings tab of BUTT you will need to select your Audio Input device. This will likely be a microphone plugged into your computer into which you will speak for your live broadcast.
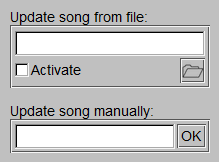
You can specify where your live broadcast metadata will be pulled from if you are incorporating tracks into your live broadcast. The area to specify this pathway is found in the Stream tab of the BUTT settings menu.

Once you have entered all the information in BUTT, click the Save Settings button under the MAIN tab.
Step 6: Check your Airtime Live Broadcast settings.
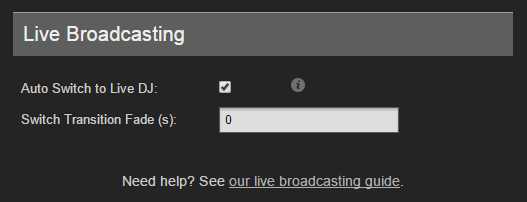
In Airtime Pro, you can check your Live Broadcast settings in Settings > Streams > Live Broadcast.
If you have the 'Auto Switch to Live DJ' enabled, when you press the play button in BUTT, you will be starting your live voice broadcast immediately. The Live Broadcasting settings in Airtime is also where you can adjust the fade between scheduled shows and your live broadcast. Enter the fade time in seconds in the text box.

If you have 'Auto Switch to Live DJ' disabled, you can still broadcast live, but you will need to switch to live broadcast manually by adjusting the Broadcast Source at the top of the Airtime interface.
Step 7: Start broadcasting live!
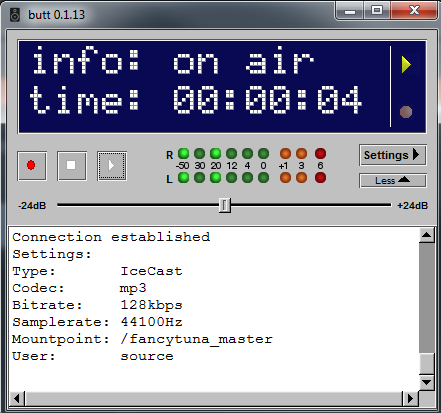
Once you’ve clicked the play button in BUTT, the main info display in BUTT will change from idle to on air. Begin talking!
Step 8: Disconnect when you are done!

When you are done broadcasting, click the stop button in the BUTT interface. Your Airtime source will switch back to scheduled shows automatically.
0 Comments