Live Blog Themes allow you to customise the layout and available features for your Blog. You can select which Theme you would like to use in the individual settings (gear icon) for each Blog. Additional changes can also be made to the look of your Blog using the Output Channel feature. Output Channels can be edited by any user, whereas Theme settings must be edited by Administrators.

To edit the Theme Settings, Administrators can find the Hamburger menu (Settings menu) in the top left corner of the Live Blog interface.

You can edit existing Themes or add new Themes by clicking on the Theme Manager link in the Admin Tools section of Hamburger menu (Settings menu).
Uploading a New Theme

To make a new theme, click the blue + NEW THEME button in the top right corner of the Theme Manager pane. Clicking on the +NEW THEME button will open a new window from which you can choose a theme file from your computer.
If you know how to code, you can create your own Theme extension. If you don’t know how to code, you can find a Live Blog theme that you like on GitHub: https://github.com/liveblog/
Tips for creating your own Live Blog Theme can be found here: https://github.com/liveblog/liveblog/pull/472/files
Managing your Current Themes

Once you have uploaded a Theme, you will see your Theme appear in the Live Blog Theme Manager window. You will see the version, author, source and the number of blogs that are using the theme displayed below the theme title.

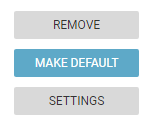
On the right side of each Theme entry, you might see 3 buttons: REMOVE, MAKE DEFAULT, and SETTINGS.
If you click on the REMOVE button, the Theme will be deleted. If the Theme is currently not being used, there will be no prompt for you to confirm your choice.
If you click on the MAKE DEFAULT button, newly created blogs will be automatically assigned this Blog Theme until you choose a new default or change the Theme in the individual Blog Settings (gear icon). Details about Blog Settings can be found in the Help Desk here.
Live Blog comes with the Angular Toolkit/Classic Theme pre-installed.
Classic Theme Blog Settings
Clicking on the SETTINGS button for the Classic theme will open a new window from which you can adjust some additional Blog Parameters:
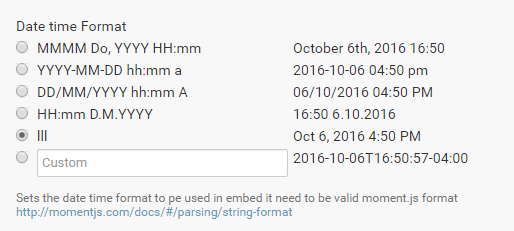
Date-Time Format

At the top of each individual blog post or published comment in the Live view your readers will see the date and time that the post was published. In the Date Time Format section, you can choose the way in which your readers will be shown the date and time of posting.
You can also toggle to show the readers a relative timestamp for all posts not older than 8 hours (i.e. 3 minutes ago) and whether you want your readers to see an additional timestamp, if the post was updated.
Theme Language

With this setting, you can translate all of the blog peripherals. Your blog peripherals include the comments button, post-sorting options, and the VIEW MORE POSTS button. Choose your desired language from the drop-down menu.
Don’t see the language you want? Help us translate our software here: https://www.transifex.com/sourcefabric/public/
Number of Posts Per Page

When readers view your Blog, they will only see a certain number of posts. The number of posts that will load can be specified in this section of the Theme Settings. Readers can always load more posts by scrolling down or by clicking on the LOAD MORE POSTS button at the bottom of the page, pictured below.

Default Posts Order

When readers first load your blog, they will see your posts in the order of your choosing: Editorial, Newest first, or Oldest first. Choose your desired display order from the drop-down menu pictured above.

The readers can then adjust the blog posts to the order of their choosing using the sort-bar below the Blog Description.
Retrieve New Posts and Infinite Scroll

When the 'click to retrieve new posts' toggle is on, readers will need to click a button, like the one pictured below, to view posts that have been published while they are currently viewing the page.

If the 'Infinite scroll' toggle is off, posts will be automatically loaded as you scroll down the page.

If the ' Infinite scroll' toggle is on, you will see the button pictured above at the bottom of the page that will allow you to load more posts. The number of posts before the button is determined by the Number of Posts per Page setting mentioned above.
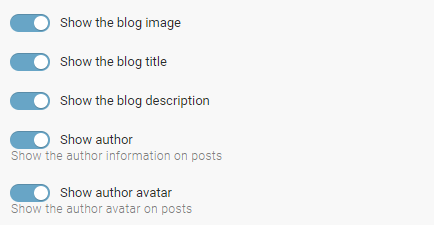
Show Options

When you first set up your Blog, you have the option to add an image and blog description. In the toggles pictured above, you can choose whether or not your blog image is displayed. You can also choose whether or not to display the blog title, blog description, author information and author avatars (user icons). If the box a unchecked, the item will not appear in your blog's Live View.
Author Name

If you choose to have the Author’s name displayed, you can customize how the author’s name is displayed: Full name, Byline or Sign off. These correspond to the matching fields in the User Profile.

The 'Author name links to email' toggle will allow the Blog readers to contact the Blog Authors privately by email. The email associated with each user can be edited in the individual user profile settings.
Permalink

You can enable a Permalink to appear for each post by activating the respective toggle.
Comments
You can enable or disable Comments using the checkbox below.

If the Comments are disabled, you will not see the Comments tab in the Editor view.

If disabled (unchecked), the Comments button, pictured above, will not appear at the top of the blog in the Live View.
Highlights
You can enable or disable the Highlights feature using the checkbox below.

Independent of this settings, Highlights will still be available internally for editors and contributors.

If the Highlights are disabled, blog readers will not see the Highlights button at the top of the Live view.
Search Engines

If this toggle is on, search engines will not index your Blog.
Slideshow Gallery

You can choose whether or not to enable the Slideshow feature for your blog. The Slideshow feature is ideal for blogs which several photos at a time. When the Slideshow feature is turned off, images will appear in large format in the main body of the Live View. The credits and captions will appear below each photo.
When the Slideshow is turned on, images will appear as smaller thumbnails with the captions and credits appearing as a reader mouses over each photo. When a reader clicks on a thumbnail they will be taken into the Slideshow mode. Images are presented in a large format, on a black background. For more about the Slideshow feature, read here.
You can read more about additional Theme settings in the full Live Blog manual here.
When you are finished adjusting your Classic Theme settings, don’t forget to save.

The SAVE button will leave the Classic Theme Settings window open. Clicking the DONE button will save the changes, close the window, and take you back to the Theme Manager.
0 Comments