You can access the Editor tab of a blog by clicking on the blog in the Blog List view. The Editor tab is one of the tabs from which you can add content to your blog.
![]()
You will see the Editor tab on the left side of the Blog Editor mode.
Choosing a post type
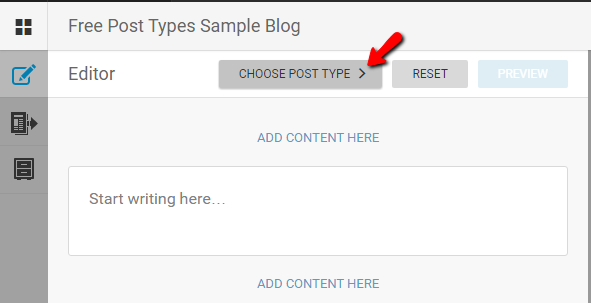
In the blog editor, under the title of the blog, next to the reset button, there is a button, labelled CHOOSE POST TYPE.
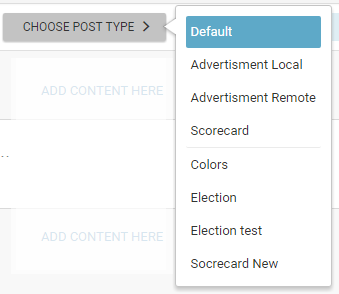
Clicking on the CHOOSE POST TYPE button will produce a list of post types, from which the user can select their new post type. The Default post type is selected unless you choose a different post type from this menu.
The three new native types, namely "Advertisement Local, "Advertisement Remote", and "Scorecard" are listed beneath the Default type in the drop-down select menu. Below the Scorecard type, you will find a list of user-created post types.
Selection of any of these new types will lead to the presentation of a form in the Editor pane instead of the Default post type.
Default Post Type

In the Editor tab, you can add media to your Default post type by clicking on the ADD CONTENT HERE buttons, above or below the default text box. It is possible to add several types of media to a single post.

Once you click the ADD CONTENT HERE button, you will have to select the type of media that you would like to add to your Blog: text, images, embeds and quotes.
Add an Image

To add an image to your post, click on the ADD CONTENT HERE button and then select the image button.
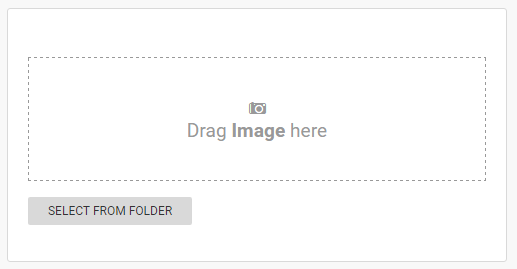
If you choose to add an image, you will be presented with the above: Click the SELECT FROM FOLDER button or click and drag the image over from a folder on your computer and drop it into the image box.
Add an Embed

An embed is a piece of media from an external source. Examples of embed sources include Facebook posts, Twitter tweets, or videos from YouTube.

If you choose to add an embed of a tweet or Facebook post you will see the above: Copy and paste the URL or embed code into the text box.
Add a Quote

Live Blog has a feature to help you format quotes.

If you choose to add a quote, you can fill in the quote on the first line and the attributed speaker on the credit line. This quote feature will automatically format the quote. It will be indented and it will look different than the plain text option.
Add Plain Text

By default, there is a text box already open in the editor tab. You can add further text boxes above or below the other media that you have inserted in your post by clicking the ADD CONTENT HERE button and selecting the text button pictured above.
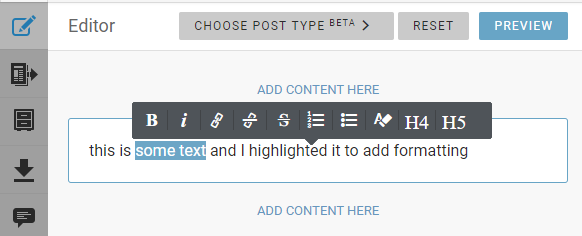
You can add formatting to plain text in a post. To do this you must first select text in the text box. Once text is selected, you will be able to add formatting or a link to your text using the pop-up grey toolbar. From left to right the formatting options are: bold, italic, add a link, remove the link, strike-though, numbered list, bulleted list and remove formatting from the highlighted text, headline 4 and headline 5 formatting. Note that the remove formatting button does not remove the numbered lists or bulleted lists. To remove the list formatting, click on the the same format button again with the text still selected.
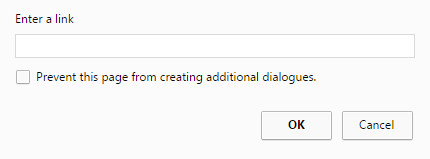
If you want to add a link, click the add link button. This will open a new window where you can input the link URL.
You can have multiple types of media in a single post by clicking the ADD CONTENT HERE button multiple times. There is no limit on the length of post.
Add Tags
In the Editor pane, you will also find a drop-down menu for Tags. Tags are used Live Blog internally for curating Output Channels and for Consumer-Producer relationships.
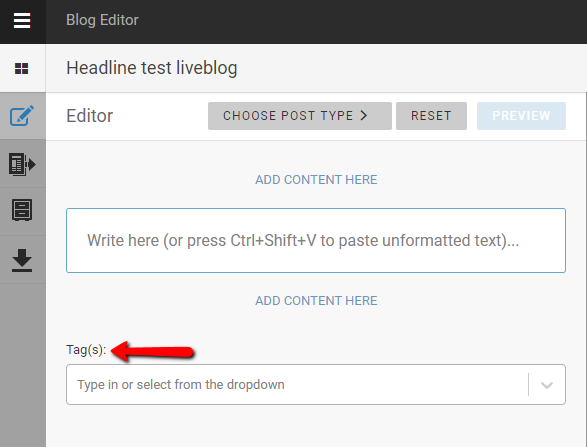
Choose a Tag from the drop-down menu if it's appropriate.

Once you have inserted all your desired media, you will have the options to publish, submit or save your post as a draft. You will find these buttons at the bottom of the Editor tab.
If you select the PUBLISH option, your post will go up on the blog as publicly visible content. If you select the SUBMIT option, your post will be sent to the Contributions tab from which the blog editors can choose to publish, edit or delete your post. If you select the SAVE DRAFT option, your post will be sent to the drafts tab, from which it can be opened and edited at a later date.

Just above the PUBLISH / SUBMIT / SAVE DRAFT buttons, you will find options for pinning and highlighting your post. Pinning a post will ensure that it always appears near the top of the blog. Highlighting a post makes it available for the highlights only view in the blog. More information on pinning and highlighting can be found in this manual. When you activate the Pin and Highlight icons, they will go from grey to coloured. When in colour, the feature will be active. You can read more about sticky posts and highlights in other parts of this Help Desk.
0 Comments