Setting up Rocket Broadcaster with Airtime Pro
Airtime Pro has an integration that now makes it easier to broadcast using Rocket Broadcaster. We will leave this article with the instructions for manually changing the connection details as a reference, however, our new Rocket Broadcaster integration automatically configures itself to connect to your stream when you click on the new Rocket Broadcaster button (pictured below).
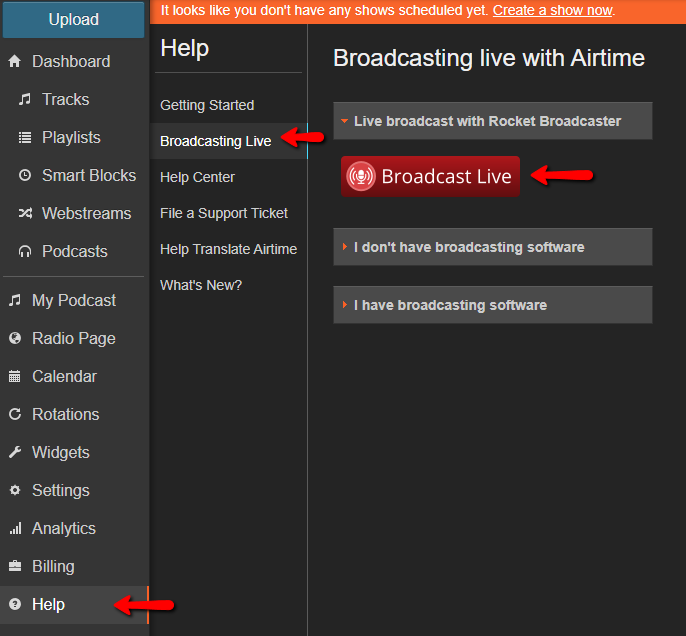
Rocket Broadcaster is just one of many applications that you can use in order to broadcast live through your Airtime Pro. Rocket Broadcaster has both a free version and a paid version.
Manual connection instructions for Rocket Broadcaster
Step 1: Download a copy of Rocket Broadcaster.
First, download a copy of Rocket Broadcaster onto your computer. You can download a free copy by visiting https://www.rocketbroadcaster.com/ . Rocket Broadcaster is compatible with operating systems running Window 7 or later.
Step 2: Open Rocket Broadcaster
Once you have downloaded a copy of Rocket Broadcaster, open the application on your computer.
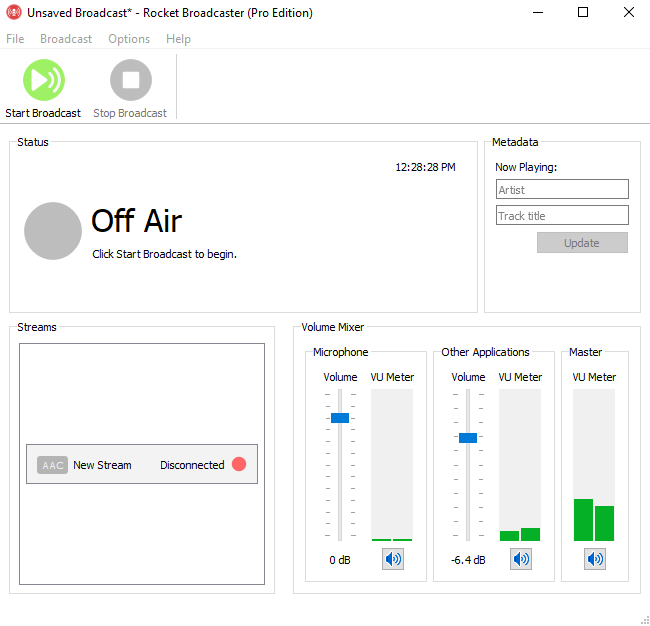
Step 3: Find your connection details in Airtime Pro.
You will need to enter the connection details from your Airtime Pro instance into Rocket Broadcaster in order to begin your live broadcast.
In Airtime Pro, you can find your connection details by selecting Settings > Streams > Master DJ Connection Details.
If you are a DJ connecting using Rocket Broadcaster, your Username and Password will be the same as you use to log in to Airtime Pro. Note that as a DJ, you can only log in and broadcast live during shows that are assigned to you.
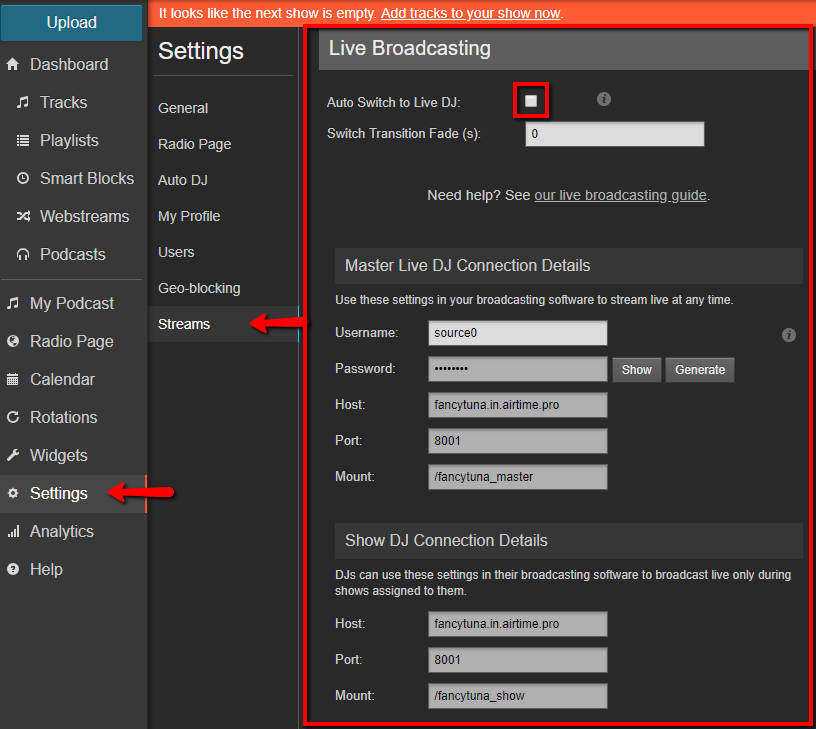
*Take note of whether your ‘Auto Switch to Live DJ’ is enabled, or not. Either way is fine, but if the setting is disabled you will need to manually switch the Broadcast Source to Live DJ .
Step 4: Enter your connection details into Rocket Broadcaster.
In Rocket Broadcaster, click on the ‘Broadcast’ menu at the top of the interface, then select ‘Streams’.
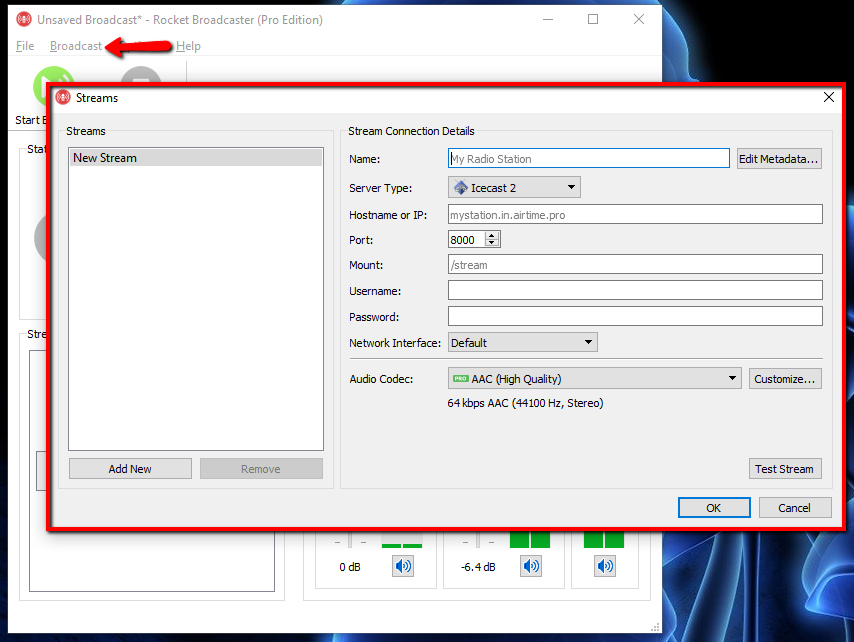
In the Rocket Broadcaster Streams window, enter a name for your connection (this can be anything).
Enter the connection details exactly as they appear in your instance of Airtime Pro.
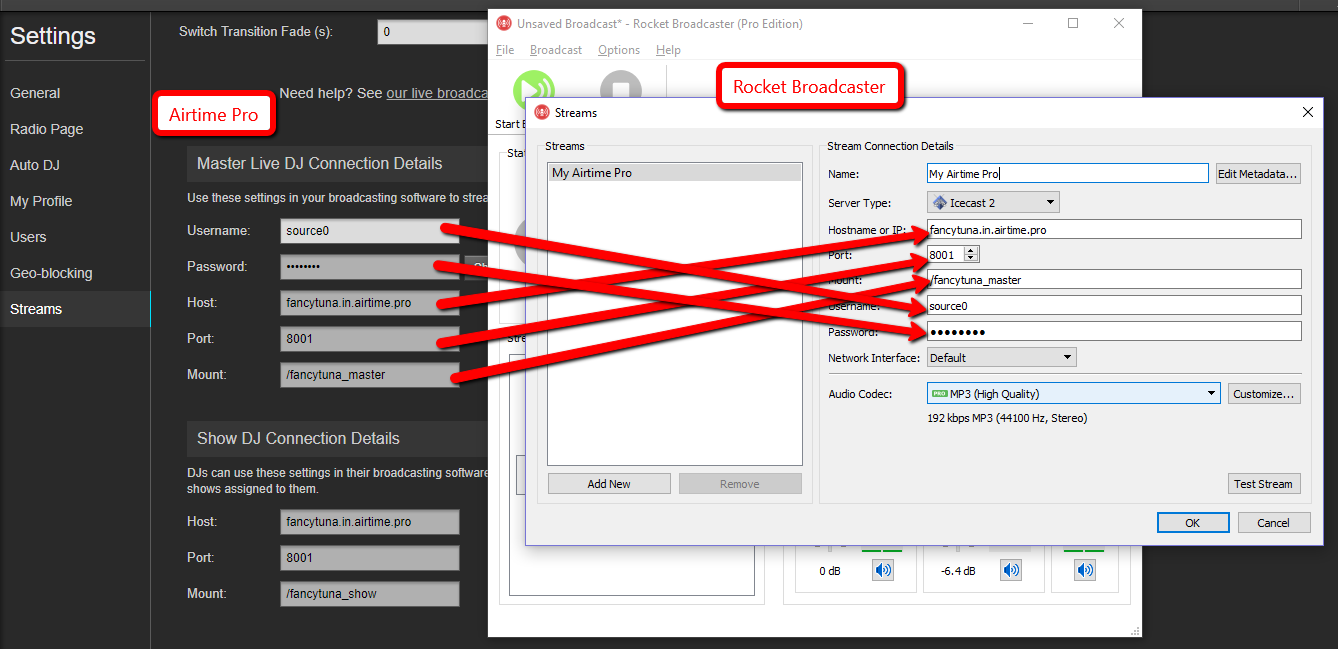
Be sure to set the Server Type to Icecast 2 and set the Audio Codec to MP3 (high quality).
Once you have entered the Airtime Pro details into Rocket Broadcaster, you can click the ‘Test Stream’ button towards the bottom of the Rocket Broadcaster Steams window to check if your details were entered correctly.
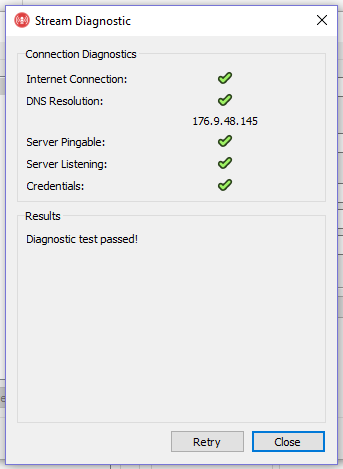
Click the ‘OK’ button in the Streams window to save your settings.
Step 5: Start broadcasting live!
Once your stream is set up correctly, click the Start Broadcasting button in the Rocket Broadcaster interface. 
If ‘Auto Switch to Live DJ’ is disabled in Airtime, you will also need to switch the Broadcast Source manually at the top of the Airtime interface in order to broadcast live.

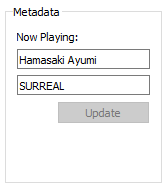
You can send metadata for any tracks that you are playing live to Airtime by manually updating them in the Rocket Broadcaster interface.
Step 6: Disconnect when you are done!

When you are done with your live broadcast, disconnect your Rocket Broadcaster by clicking on the ‘Stop Broadcast’ button in the Rocket Broadcaster Interface. Depending on your settings, you might need to manually adjust your Airtime Broadcast Source back to your scheduled programming.

1 Comments